|
Merchant Gateway Manager is a configurable H-Sphere add-on
that allows you to set up and alter merchant gateways, the
media for conducting transactions with online credit card
processing centers. The software tracks gateway usage and
provides statistical information on the number of transactions
and total charges for every particular gateway.
Merchant Gateway Manager allows you to setup different merchant
gateway accounts for different types of credit cards (like
VISA, MasterCard, Discover, American Express). In this way
you can maximize your profits by processing every type
of credit card with the gateway that offers the lowest rate
for this type of card.
This document explains how to:
Positive Software recommends Processing Credit Cards Payment Solutions:

Setting Up Merchant Gateways
Once you have registered an account with a credit card processing center, you can
set up a merchant gateway to your H-Sphere configuration. To start with,
select Merchant Gateway in the Settings menu:
The following page will appear:
Important: Tune up your billing with Dummy Gateway before getting your
system going. Dummy Gateway enables you to test and see how it works without actual charges.
AuthorizeNet (ADC Relay)
To set up AuthorizeNet:
- Select AuthorizeNet in the Add New Gateway box.
- Click the Add button.
- Fill out the form that appears:
- Title: give a name to this AuthorizeNet connection
- Server: the name of the AuthorizeNet server
- Port: the port of the AuthorizeNet server
- Path: the .dll file path that you got from AuthorizeNet
- Login: your AuthorizeNet login.
- Password: you must enter your AuthorizeNet password here, but disable
Require Password in the AuthorizeNet interface.
- Referrer URL: the URL of the page that requests the payment.
It's required as in some cases requests can be canceled without this information.
Referrer URL can be your control panel URL, e.g: http://cp.your_domain (http://cp.example.com).
Make sure to put the same Referrer URL in your AuthorizeNet interface in settings -> response/receipt URLs,
otherwise the request will be denied.
- Test Mode:
- FALSE: credit card transactions will be completed and credit cards will be charged;
- TRUE: authorization requests will be sent for verification without
settlement requests and credit cards won't be charged.
* In Test Mode, all transactions appear to be processed as real transactions.
The gateway accepts the transactions, but does not pass them on to the financial institutions.
Accordingly, all transactions will be approved by the gateway when Test Mode is turned on.
Transactions submitted in Test Mode are not stored on the system, and will not appear in
any reports or lists.
- Click Submit Query
AuthorizeNet is ready for use immediately after the installation of H-Sphere.
Note: H-Sphere doesn't check AuthorizeNet transactions with AVS. To use this tool for H-Spehre transactions,
enable and configure AVS support in your AuthorizeNet account.
AuthorizeNet (SIM protocol)
(version 2.3 RC4 and higher)
To set up AuthorizeNet (SIM protocol):
- Select AuthorizeNet (SIM protocol) in the Add New Gateway box.
- Click the Add button.
- Fill out the form that appears:
- Title: give a name to this AuthorizeNet connection
- Server: the name of the AuthorizeNet server
- Port: the port of the AuthorizeNet server
- Path: the .dll file path that you got from AuthorizeNet
- Login: your AuthorizeNet login.
- Transaction Key: a unique gateway-generated alphanumeric string that is
used by the gateway to authenticate the fingerprint and the transaction as
originating from an authorized merchant (see below).
- Referrer URL: the URL of the page that requests the payment.
It's required as in some cases requests can be canceled without this information.
Referrer URL can be your control panel URL, e.g: http://cp.your_domain (http://cp.example.com).
Make sure to put the same Referrer URL in your AuthorizeNet interface in settings -> response/receipt URLs,
otherwise the request will be denied.
- Test Mode:
- FALSE: credit card transactions will be completed and credit cards will be charged;
- TRUE: authorization requests will be sent for verification without
settlement requests and credit cards won't be charged.
* In Test Mode, all transactions appear to be processed as real transactions.
The gateway accepts the transactions, but does not pass them on to the financial institutions.
Accordingly, all transactions will be approved by the gateway when Test Mode is turned on.
Transactions submitted in Test Mode are not stored on the system, and will not appear in any reports or lists.
- Click Submit Query
To obtain the Transaction Key from the Merchant Interface:
- Log into the Merchant Interface;
- Select Settings from the Main Menu;
- Click Obtain Transaction Key in the Security section;
- Type in the answer to your secret question
(The secret question and answer are setup during account activation.
It is required to authenticate the merchant before the transaction key is generated.)
- Click Submit;
- The transaction key is returned by the Merchant Interface.
Note: Please make sure the time on your control panel server is precisely synchronized,
or else transaction requests will be declined by AuthorizeNet.
AuthorizeNet (SIM Protocol) is ready for use immediately after the installation of H-Sphere.
Note: H-Sphere doesn't check AuthorizeNet transactions with AVS. To use this tool for
H-Spehre transactions, enable and configure AVS support in your AuthorizeNet account.
Bibit (version 2.09 and higher)
To set up Bibit:
- Select Bibit in the Add New Gateway box.
- Click the Add button.
- Fill out the form that appears:
- Title: give a name to this Bibit connection
- Server: the name of the Bibit server
- Port: the port of the Bibit server
- Path: the .dll file path that you got from Bibit
- Login: your Bibit login.
- Password: the password which comes with the login.
- Merchant Code: the string that you get from Bibit.
- Currency: the currency in which end users will be charged
for your services and hosting resources
- Click Submit Query
Bibit is ready for use immediately after the installation of H-Sphere.
CyberCash
To set up CyberCash:
- Select CyberCash in the Add New Gateway box.
- Click the Add button.
- Fill out the form that appears:
- Title: give a name to this CyberCash connection
- Server: the name of the CyberCash server
- Merchant Key, CyberCash ID, Hash Secret: once you
register CyberCash account you are given this login info.
Do not share it with anyone. The security of your system
could be compromised if you do
- Click Submit Query
To test your transactions before you go live, get a test account
from CyberCash.
Read how to install CyberCash.
Echo
To set up Echo:
- Select Echo in the Add New Gateway box.
- Click the Add button.
- Fill out the form that appears:
- Title: give a name to this Echo connection
- Login: your Echo login
- Pin: once you register Echo account, you are given this unique pin code to verify
charge requests
- E-mail: e-mail you provided on signing up the contract with Echo.
It's used to verify charge requests from your CP
- Click Submit Query
Read how to install Echo.
Ematic
To set up Ematic:
- Select Ematic in the Add New Gateway box.
- Click the Add button.
- Fill out the form that appears:
- Title: give a name to this Ematic connection
- Server: the name of the Ematic server
- Port: the port of the Ematic server
- Path: the .dll file path that you got from Ematic
- Login: your Ematic login.
- Password: the password which comes with the login.
- Click Submit Query
Ematic is ready for use immediately after the installationof H-Sphere.
ePDQ (version 2.09 and higher)
To set up ePDQ:
- Select ePDQ in the Add New Gateway box.
- Click the Add button.
- Fill out the form that appears:
- Title: give a name to this ePDQ connection
- Server: the name of the ePDQ server
- Port: the port of the ePDQ server
- IP Address: your external control panel IP address
- Login: your ePDQ login.
- Password: the password which comes with the login
- Client ID: the unique client ID code you get from ePDQ
- Currency: the currency in which end users will be charged
for your services and hosting resources
- Test Mode:
- FALSE: credit card transactions will be completed and credit cards will be charged;
- TRUE: authorization requests will be sent for verification without
settlement requests and credit cards won't be charged
- Click Submit Query
Read how to install ePDQ.
InterCept (version 2.3.1 and higher)
- Select InterCept in the Add New Gateway box.
- Click the Add button.
- Fill out the form that appears:
- Title: give a name to this InterCept connection
- Server: the name of the InterCept server.
- Port: the port of the InterCept server.
- Company key: this will serve as your InterCept login.
- Security key: used for For DES/TDES encryption. This key must contain
16 hex digits. If the key is incorrect, the information will be encrypted
incorrectly, and an error will be generated.
- Terminal ID: This is the InterCept Payment Solutions assigned ID for the
device that will be performing transactions with the payment servers. Multiple
Terminal ID's can be assigned per account based on the number of terminals
performing transactions. A terminal can be defined as, but not limited to, a
specific web site, personal computer, handheld device or card swipe terminal.
If your company has multiple terminals and only one terminal is sending
incorrect or fraudulent information, we would have the ability to shut this
one terminal down without interrupting the remainder of the terminals doing business.
If a merchant does not choose multiple Terminal ID's and for any reason the ID
needs to be deactivated, all terminals would be affected. It is the merchant's
responsibility to request multiple Terminal ID's. This field is alpha numeric with
a maximum of 15 characters.
- Currency: the currency in which end users will be charged
for your services and hosting resources.
- Click Submit Query.
Read how to install InterCept.
IonGate (version 2.3 RC4 and higher)
- Select IonGate in the Add New Gateway box.
- Click the Add button.
- Fill out the form that appears:
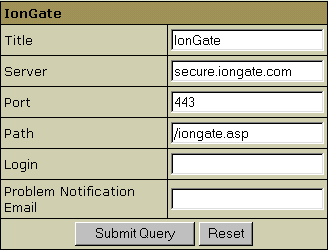
- Title: give a name to this IonGate connection
- Server: the name of the IonGate server
- Port: the port of the IonGate server
- Path: path to the the .asp file on the IonGate server
- Login: your IonGate login
- Problem Notification Email - enter email to receive notifications about:
- AVS (Address Verification Service) problems. Read above to know more about AVS
- H-Sphere signup error: user's signup failure for unknown reasons after credit card is charged.
When either of the mentioned problems appear, H-Sphere sends a message to this Notification E-mail
with the recommendation to void the transaction in merchant's gateway account due to AVS problems or system faults.
To cancel the transaction, the owner of H-Sphere should access his merchant account and cancel the transaction manually.
- Click Submit Query
Note: In July 2003 IonGate has updated its ssl certificate. The new certificate
is trusted by Equifax. Since the standard java cartcerts file doesn't include Equifax
public certificate, H-Sphere returns "Connect error, untrusted server cert chain" when
trying to connect to the merchant gateway. To fix this, use the keytool feature available
in the standard java installation. Read more
how to configure IonGate for correct work.
LinkPoint
To set up LinkPoint:
- Select LinkPoint in the Add New Gateway box.
- Click the Add button.
- Fill out the form that appears:
- Title: give a name to this LinkPoint connection
- Config File: the 5-6 digit code name for the Link Point
server config file. The code name has the functionality of a login.
- Insert the path to the Key File: enter the path
to the certificate that you get from LinkPoint.
- Server: the name of the LinkPoint server
- Port: the port of the LinkPoint server
- Test Mode:
- FALSE: credit card transactions will be completed and credit cards will be charged;
- TRUE: authorization requests will be sent for verification without
settlement requests and credit cards won't be charged
- Click Submit Query
Read how to install LinkPoint.
LinkPoint (java client)
(available in version 2.3.1 and higher)
To set up LinkPoint (java client):
- Select LinkPoint (java client) in the Add New Gateway box.
- Click the Add button.
- Fill out the form that appears:
- Title: give a name to this LinkPoint connection
- Server: the name of the LinkPoint server
- Port: the port of the LinkPoint server
- E-Mail: you will receive e-mail confirmations from LinkPoint to this address
- Config File: the server config file you got from LinkPoint
- Test Mode:
- FALSE: credit card transactions will be completed and credit cards will be charged;
- TRUE: authorization requests will be sent for verification without
settlement requests and credit cards won't be charged
- Click Submit Query
* With LinkPoint (java client) account, you'll get the certificate and key *.der
files. When setting up LinkPoint (java client) account, you'll obtain exclusive names for
these files to be saved into the /hsphere/home/cpanel/shiva/psoft_config/linkpoint/
directory. To learn H-Sphere generated der file names,
in the Edit Gateway box choose LinkPoint (java class) from the drop-down box and click the Edit button.
The page that appears will show the directories and filenames to store these files in.
Read how to install LinkPoint (java client).
NetBilling
To set up NetBilling:
- Select NetBilling in the Add New Gateway box.
- Click the Add button.
- Fill out the form that appears:
- Title: give a name to this LinkPoint connection
- Choose Protocol which will be used to connect to gateway server (http/https)
- Server: the name of the NetBilling server.
- Account: your NetBilling account ID.
- SiteTag: your brief site nickname.
- Enter Notification Email for VOID Transactions
Note: NetBilling doesn't support VOID transactions. Instead, H-Sphere sends
you an e-mail notification that a transaction needs to be canceled manually through NetBilling web interface.
- Click Submit Query
If you have probems with NetBilling, read how to configure NetBilling.
Paradata
To set up Paradata:
- Select Paradata in the Add New Gateway box.
- Click the Add button.
- Fill out the form that appears:
- Title: give a name to this LinkPoint connection
- Account Token: the unique code generated
on the basis of your login and password that you get when
opening the Paradata merchant gateway account.
*Adding TEST before the token will set
the merchant gateway account into the test mode.
- Click Submit Query
Read how to install Paradata.
PayAndShop
To set up PayAndShop:
- Select PayAndShop in the Add New Gateway box.
- Click the Add button.
- Fill out the form that appears:
- Title: give a name to this PayAndShop connection
- Merchant Id: the code given to you by PayAndShop.
This is NOT the merchant number supplied by your bank
- Secret: the encryption code given to you by PayAndShop
- Account: your account name given to you by PayAndShop.
- Currency: the currency in which end users will be charged
for your services and hosting resources
- Click Submit Query
Read how to install PayAndShop.
PayGate (version 2.4 and higher)
To set up PayGate:
- Select PayGate in the Add New Gateway box.
- Click the Add button.
- Fill out the form that appears:
- Title: give a name to this PayGate connection
- Server: the name of the PayGate server
- Port: the port of the PayGate server
- Path: path on the PayGate server to the the .asp script that does
all transactions except Capture.
- Path for Capture transaction: path to the script that does the Capture transaction.
- Merchant ID: the unique client ID code you get from PayGate.
- Password: the password to encrypt/decrypt https requests and responses exchanged
between PayGate and the Control Panel.
- Currency: the currency in which end users will be charged
for your services and hosting resources.
- Notification Email for VOID Transactions - PayGate doesn't support VOID transactions.
Instead, H-Sphere sends you an e-mail notification that a transaction needs to be canceled
manually through PayGate web interface.
- Click Submit Query
PayGate is ready for use immediately after the installation of H-Sphere.
PayReady
To set up PayReady:
- Select PayReady in the Add New Gateway box.
- Click the Add button.
- Fill out the form that appears:
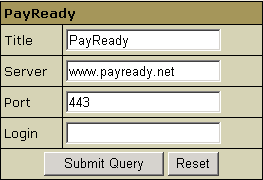
- Title: give a name to this PayReady connection
- Server: the name of the PayReady server
- Port: the port of the PayReady server
- Login: your PayReady login.
- Click Submit Query
PayReady is ready for use immediately after the installation of H-Sphere.
Plug'n Pay (version 2.3 RC4 and higher)
Before you configure the Plug'n Pay connection, you need to download the certificate file.
- Go to http://www.plugnpay.com,
Choose Login to Merchant account, and log in using your Plug'n Pay login and password.
- Click the API & Cart Downloads link and find the 'certs.zip' link in the 'Java' section.
- Download the certs.zip file, and unpack it to the CP box.
- Select Plug'n Pay in the Add New Gateway box.
- Click the Add button.
- Fill out the form that appears:
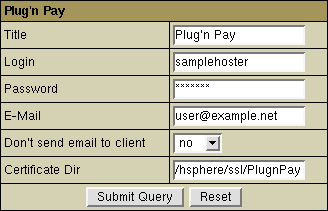
- Title: give a name to this Plug'n Pay connection
- Login: your Plug'n Pay login
- Password: the password which comes with the login
- E-mail: the address you provided on signing up with Plug'n Pay.
It's used to verify charge requests from your CP
- Don't Send E-mail to Client: Leave this box unchecked to have your end
customers notified when they are charged. The e-mail addresses are taken from
their contact info.
- Certificate Dir: the directory on the H-Sphere control panel server
where you have put the certificate file.
- Click Submit Query
Read more on how to install Plug'n Pay.
PSiGate
To set up PSiGate:
- Select PSiGate in the Add New Gateway box.
- Click the Add button.
- Fill out the form that appears:
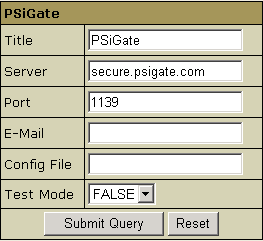
- Title: give a name to this PSiGate connection
- Server: the name of the PSiGate server
- Port: the port of the PSiGate server
- E-Mail: you will receive e-mail confirmations from PSiGate to this address
- Config File: the server config file you got from PSiGate
- Test Mode:
- FALSE: credit card transactions will be completed and credit cards will be charged;
- TRUE: authorization requests will be sent for verification without
settlement requests and credit cards won't be charged
- Click Submit Query. It will generate filenames for you to use for
storing Certificate and Key received from PSiGate.
- Make sure to submit the PSiGate form with filenames generated once
more on the Edit Merchant Gateway page:
- In the Edit Gateway box choose PSiGate from the drop-down box.
- Click the Edit button. The page that appears will show the
directories and filenames for Key and Certificate:
- Click the Submit Query button.
- Install PSiGate.
SecurePay
To set up SecurePay:
- Select SecurePay in the Add New Gateway box.
- Click the Add button.
- Fill out the form that appears:
- Title: give a name to this SecurePay connection
- Server: the name of the SecurePay server
- Port: the port of the SecurePay server
- Path: path to the the .asp file on the SecurePay server
- Merchant Id: the code given to you by SecurePay.
This is NOT the merchant number supplied by your bank
- Click Submit Query
SecurePay is ready for use immediately after the installation of H-Sphere.
Secure Trading
- Select Secure Trading in the Add New Gateway box.
- Click the Add button.
- Fill out the form that appears:

- Title: give a name to this Secure Trading connection.
- Currency: the currency in which end users will be charged for your services and hosting resources.
- Site Reference: this value stands for login name.
- Notification Email for VOID and CAPTURE transactions: Secure Trading
doesn't support VOID and CAPTURE transactions. Instead, H-Sphere sends you
an e-mail notification that a transaction needs to be canceled or
settled manually through Secure Trading web interface.
- Click Submit Query.
- In the Edit Gateway box choose Secure Trading from the drop-down box.
- Click the Edit button.
The page that appears shows the Path and name for certificate file.
You need to place the certificate which you received from Secure Trading under that name.
- Click Submit Query.
Read more about how to install SecureTrading.
Skipjack (version 2.3 RC4 and higher)
- Select Skipjack in the Add New Gateway box.
- Click the Add button.
- Fill out the form that appears:
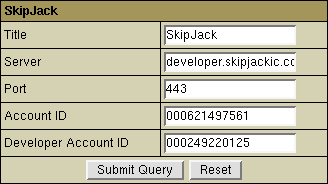
- Title: give a name to this Skipjack connection
- Server: the name of the Skipjack server
- Port: the port of the Skipjack server
- Account ID: the ID you are given by Skipjack when you go live
- Developer Account ID: the ID you are given when you sign up for a trial Skipjack account
- Click Submit Query
Note: Skipjack certificate is trusted by Equifax.
Since the standard java cartcerts file doesn't include Equifax
public certificate, H-Sphere returns "Connect error, untrusted server cert chain" when
trying to connect to the merchant gateway. To fix this, use the keytool feature available
in the standard java installation. To configure Skipjack, read HERE.
Surepay (version 2.3 RC3 and higher)
- Select Surepay in the Add New Gateway box.
- Click the Add button.
- Fill out the form that appears:
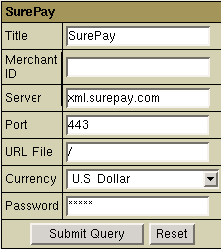
- Title: give a name to this Surepay connection
- Merchant ID: the unique client ID code you get from Surepay.
- Server: the name of the Surepay server.
- Port: the port of the Surepay server.
- URL File: the .dll file path that you got from Surepay; as of current version you should enter
just a slash "/".
- Currency: the currency in which end users will be charged
for your services and hosting resources.
- Password: the password provided by Surepay to your account.
- Click Submit Query
Read how to install SurePay.
VeriSign Payflow Pro
- Select Payflow Pro in the Add New Gateway box.
- Click the Add button.
- Fill out the form that appears:
- Title: give a name to this Payflow Pro connection
- Server: the name of the Payflow Pro server
- Port: the port of the Payflow Pro server
- Partner: your partner ID given to you by the authorized
VeriSign Reseller who signed you up for the Payflow Pro service.
- AVS (version 2.09 and higher): stands for Address Verification
Service. AVS can be used as an additional layer of protection for merchants
who wish to verify that the purchaser knows the billing address of the cardholder
(in case these are two different people). This is not a very serious form
of risk mitigation or fraud prevention, and yet it does give some assurance
that a hacker isn't simply generating a list of valid credit card numbers
and purchasing product at will.
AVS simply matches the numeric portion of the cardholder's street billing
address and the 5 or 9-digit zip code of the cardholder's billing address.
The AVS request parameters are STREET and ZIP. The processing network verifies
the AVS information, comparing a portion of the billing address from the request
message with address data on file at the VIC or the issuer's center. Based
on the comparison, a response will be returned which confirms whether the
information matches or not. Banks do not decline transactions based on the
AVS check. The AVS response is returned as two single tab-delimited characters:
YY, NN, YN, NY (Y-"matches", N for "doesn't match"). This
information is just an advice. However, the H-Sphere system will either allow
or decline the transaction depending on the selected AVS status.
AVS is only supported for US cardholders.
- Login: your Payflow Pro login.
- Password: the password which comes with the login
- Click Submit Query
Read how to install Payflow Pro.
Verisign Payflow Pro with SSL Support (version 2.3 and higher)
Configuring Verisign Payflow Pro merchant gateway account with SSL support
is similar to configuring VeriSign Payflow Pro. To configure it:
- Select Payflow Pro in the Add New Gateway box.
- Click the Add button.
- Fill out the form that appears:
- Title: give a name to this Payflow Pro connection
- Server: the name of the Payflow Pro server
- Port: the port of the Payflow Pro server
- Partner: your partner ID given to you by the authorized
VeriSign Reseller who signed you up for the Payflow Pro service.
- AVS: read above about Address Verification Service for VeriSign Payflow Pro.
- Login: your Payflow Pro login.
- Vendor: enter your Payflow Pro vendor.
- Password: the password which comes with the login
- Path to the certificate file: enter the path to the SSL certificate
you received when you signed up with VeriSign Payflow Pro
- Click Submit Query
Read how to install Payflow Pro with SSL support.
Associating Merchant Gateways with Credit Card Vendors
Now that you have configured one or more merchant gateways, you need to
associate them with credit card vendors. You can have different credit card brands
processed with different processing centers. For example, you can configure
H-Sphere to process VISA and MASTERCARD with AuthorizeNet, and AMERICAN EXPRESS - with
CyberCash. To set the associations:
- In the Set Active field, choose the credit card brand and the processing
center it will be charged through.
- Click the Activate button to create the association. Now your Merchant
Gateway Manager form should look similar to this:
Make sure to create associations for each credit card brand you would like to support.
Users won't be able to pay with the credit cards that haven't been associated
with any processing center.
Editing description for User credit card statements.
(version 2.2 and higher)
Use this feature to let your customers know from their credit card statements what
charges are related to hosting with H-Sphere.
- Select Merchant Gateway in the Settings menu.
- Enter the description text in the Edit Description text box.
- Click Submit Query.
Handling CC charge request failures
(version 2.3 and higher)
H-Sphere suggests a solution to handle rejected credit card transactions by setting the maximum
failed charge attempts and the retry interval. If a processing center rejects
a CC charge request, H-Sphere will:
1. debit the account;
2. notify the user by e-mail at the address provided in the user contact/billing info;
3. send this CC request again in the defined period of time (see below);
4. disable any other paid operations with this CC until this period elapses.
With the first successful credit card transaction, the charge failure counter is reset.
To configure this behaviour:
- Select Merchant Gateway in the Settings menu.
- Fill out the last two fields on the Merchant Gateway Manager page:
- Maximum allowed failed charge attempts for credit cards:
restrict the number of CC charge request failures.
- Retry interval after failed attempt to process CC (min):
set the period (in minutes) to elapse before the system resends
the charge request. Until then, the system will disable any transactions
with this CC.
If charge failures reach the maximum number allowed, H-Sphere will mark such credit card as
nonchargeable until you reset the charge failure counter:
- Select CC processing errors in the Reports menu;
- Retrieve the needed account;
- In the Controls column of the Search Results page,
click the Reset icon for this account.
|